This is default featured slide 1 title

Go to Blogger edit html and find these sentences.Now replace these sentences with your own descriptions.

This is default featured slide 2 title

Go to Blogger edit html and find these sentences.Now replace these sentences with your own descriptions.

This is default featured slide 3 title

Go to Blogger edit html and find these sentences.Now replace these sentences with your own descriptions.

This is default featured slide 4 title

Go to Blogger edit html and find these sentences.Now replace these sentences with your own descriptions.

This is default featured slide 5 title

Go to Blogger edit html and find these sentences.Now replace these sentences with your own descriptions.

Pages

Showing posts with label tips and tricks. Show all posts

Monday, January 2, 2012

How to place Nuffnang Ads between posts in Blogger

few info about Nuffnang..
Bloggers makes use of Nuffnang to earn from their blogs, primarily. Well Nuffnang offers bloggers more than money earnings, as far as my readings is concerned. If you want to know more about Nuffnang you can visit their site www.nuffnang.com
Mostly, :wink: everyone would want the ads to be seen in every post they have. Nuffnang provided the code/script and a tutorial for that. But the provided sample of Nuffnang is placing the ADS code below the blog post (just right above the navigation links of newer post, home, and older post). See the tutorial HERE.

Hmm don't want to go to the link I've given? Just read it here. And see the other options of pasting the Nuffnang codes in different positions of your blog post.
  • Copy the code provided by Nuffnang. (Get the code under To put between contents.)
  • Open your blogger account.
  • If you're using the old version (blogger.com), click Design, else go to the next bullet (right after the 3rd picture below)

Saturday, December 31, 2011

Exporting and importing blog posts from my older blogs


Grettings everyone!

As this year, 2011, near its end, I wanna upload here some of the entries I've made from my older blogs. :happy2: So it'll say that I've started posting here since a year ago, but that is only due to the dates of the posts I've imported.. :a: The real deal is by November 7, 2011... that's so recently but then I've been blogging for years only that I deleted or deactivated lots of blog I've made due to disappointment of giving them less time and attention 

:idea: I want to populate this blog of the entries I've made so far :wink:

How to import entries / blog posts??? [continue reading..click image below]


Well first you need to have the backup of the posts. To do that, export the posts from your preferred blog.. :wink:


  • Look for the blog where you want to get/retrieve/export the posts.
  • Go to Settings.
  • Pick the Others option.
  • Under Blog tools, pick the Export Blogs.
  • Save it, well it should be titled date (mm-dd-yy) and is an xml file.

Then that's the time we Import the Posts... :happy1:

  • Look for the blog where you wish to put/upload/add/import the posts.
  • Go to Settings.
  • Pick the Others option.
  • Under Blog tools, pick the Import Blogs.
  • Choose the xml file.
  • Click Import. :OK:

You'll be given a choice whether you wish to publish all the imported posts or not. I picked the later so that I can still choose which to publish and which not to. :happy1:

Tuesday, July 26, 2011

Change Google+ Language

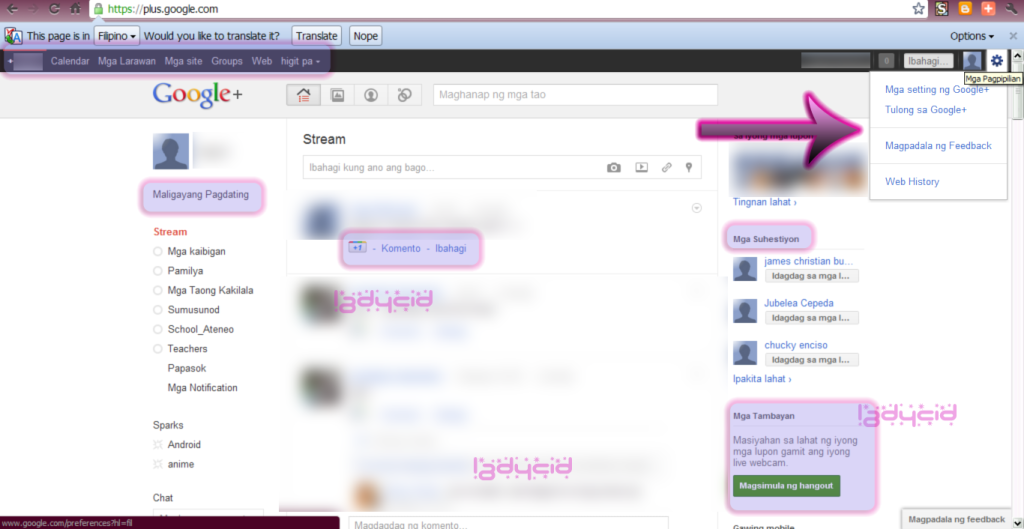
The language is on Tagalog mode..


This is the first thing I always wanna modify on every sites or networking community I have joined, its language settings. I always wanna have the standard language (English, though it's not my native language) so it'll be easier to navigate and do other stuffs.

So..
1. click on the gear tool on Google+ menu bar to find Google+ settings.
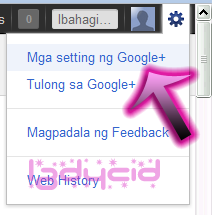
2. click the first option (tagalog mode - Mga Setting ng Google +), it would probably mean Google+ settings

By now..you'll be transferred to a settings page...

Wednesday, June 1, 2011

How to Hide or Show Blogger Navbar

What is a Blogger Navbar?
Blogger Navbar is a nagivational toolbar provided by Blogger.  By defauly, it would appear at the top of every blogspot blogs. Navbar contains:
  •  a search bar (which helps you search anything on the blog you are currently viewing)
  •  share (which helps you promote the blog to twitter, facebook, google buzz, and google reader)   
  •  report abuse
  • next blog (which brings you to some random blogs)
  • email address if you are logged on with your account or none if you haven't
  • if you are the owner of the blog and you are logged on with your account, you see the links of New Post and Design (allowing you to access this services faster)
  • Create Blog if you are not the owner of the blog
  • Sign in or Sign out  which depends on your current state, whether you're logged in with your account or not 

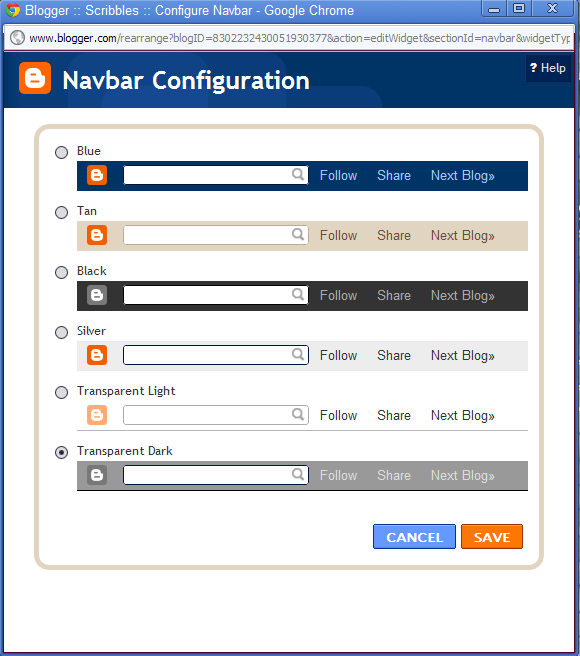
You can configure the navbar by choosing your preferred color.
Just go to Design and select Page Elements.
Find the Navbar design and click Select.
A pop up will appear like the image shown above.

Friday, May 27, 2011

Color Picker and Color Sniffer

Color mixing and matching may be hard during the designing process. Photo editor or other designing applications provide us with their own color picke. The application works by clicking a spot in the box of colors or virtual palette and the application will generate the necessary code (HSB and RGB) or automatically change their primary color to be used.

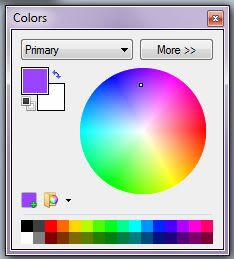
This is a sample color picker provided by Paint.net which I often use than the ordinary Paint provided by Windows. You click the spot (mouse pointer is represented by a small box) of desired color from the pie of colors or the color palette provided below and the application changes automatically its primary color.


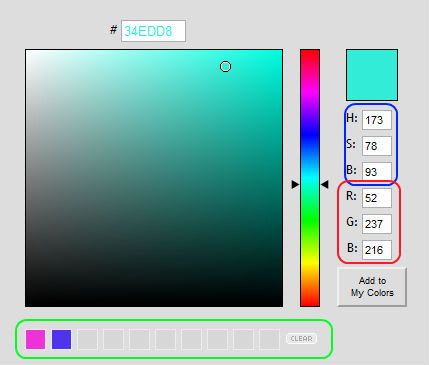
This other application is an online color picker tool provided by Color Picker.com. The same rule applies. You click on the spot (mouse pointer is represented by the small circle) and the tool generates code for HSB and RGB found on the right part.

Additional feature is also given wherein you can save or add the colors in the My Colors or palette part found right below the tool.


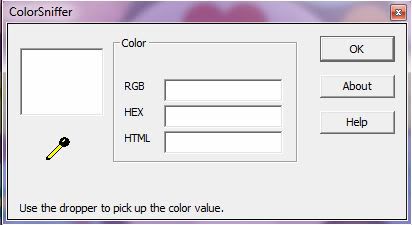
And my most preferred tool from all I've used is the Color Sniffer. I've seen it first from a video tutorial of designing a Microsoft PowerPoint Presentation template. I found it very useful and easy to use. You can easily pick colors from the screen (giving us freedom in choosing colors). This application is found in Rcfreestyle website. You can download it there.


So how to use it?
Click on the dropper tool and hold down your left mouse while you pick colors from the screen.


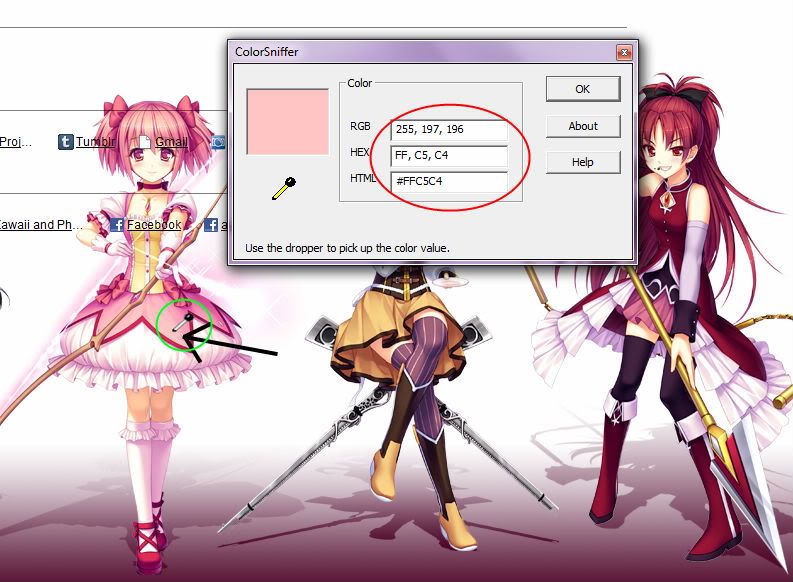
While holding down your left mouse, the dropper color changes to white. As you pause from navigating through the screen or release the mouse, codes for RGB, HEX, and HTML are generated. I use the HTML or HEX codes most of the time for my web designs and java application development.


I enlarged the picture to show the dropper clearly (I hope so)... :)

The problem with this application is that when you hit the OK button, the application closes. So you have to reopen the application to use it again. To avoid this, you just leave the application to your preferred location on the screen. To avoid it from blocking the other windows, I place it right below the screen, maybe somewhere on the clock part (lower right part) or even lower than that place.

You can also use another color sniffer application. The whole logic is also the same with the sniffer.
Quick HTML Color Picker - Quick HTML Color Picker is a free Windows color picker tool. With Quick HTML Color Picker, you can easily pick any color from the screen. You can preview the color, use mouse or keyboard to select the color you wanted, and get the color in RGB and HTML format. You can cancel a capture by "Esc" key or right-clicking. Supports saving html color value to clipboard automatically. And it's totally free! - the site
So find the application on http://quick-html-color-picker.allgraphicstools-com.qarchive.org/ .

Enjoy this fun and easy ways on choosing colors :) It'll help much for the mix and match color designs..